3CX Web Client Quick Guide
The 3CX Web Client is easy to use and combines all the features you need to efficiently communicate, collaborate and connect with colleagues, partners and customers, straight from your browser. From this one interface, you can easily make calls, view the status of colleagues, hold a video conference, and communicate with customers via voice, live chat, Facebook messaging and SMS.
Let’s get started: Logging on
In your Welcome Email, you’ll find your credentials and a link to the web client. If you’ve lost your Welcome Email, do not worry, you can have it resent via the smartphone app (iOS, Android), or from the desktop client.
To resend the welcome email from the smartphone apps:

- In the app tap the menu button in the top left corner.
- Go to “Settings” then tap “Resend Credentials”.

From the Windows app:

- Click the “Settings” button.
- Click “Resend Credentials”.

Placing a call
Quickly and easily start a call by entering the phone number, or searching by name, extension number or email address. Click the phone icon and voilà, you’ve just made your first call.
IP phone, smartphone or web client - It’s your call

You can seamlessly place calls from your IP phone, the iOS or Android app, web client or the Windows app - wherever you have provisioned your extension. What’s more, by using the phone selector in the web client, you can easily select your preferred device and seamlessly control calls from the web client interface.
In-call functions
Once you’re in a call, you can perform a number of actions with just a few mouse clicks.

Transferring a call
Click on “Transfer” and simply enter the name or number of the person you want to transfer the call to. The call is transferred without you speaking to the receiver on the other end - this is known as a blind transfer.
To speak to the receiver and get permission to transfer a call, click “Att.transfer”. This will allow you to put the caller on hold and speak to the receiver before passing the call through.
Creating a conference call
Click the “Conference” button and enter the name or number of the person/s you would like to add to the call. They will be dialed and upon answering, will be added to the existing call.
Recording a call
At any time during a call, you may record the conversation. Simply click “Record” to begin and click again to end the recording. Recordings can be accessed in the Web Client > “Recordings”.
Note: The ability to record and to view/edit recordings depends on the permissions given to you by your administrator.
Initiating a new call
During an ongoing call, you may initiate a new call on a separate line without hanging up on the current call. To do this, click “New Call” and enter the name or number of the callee.
Manage your Status
Make the most of the Status feature to save time and increase efficiency by seeing which colleagues are available to take calls. Avoid distractions and set your own status to let others know when you’re away or you don’t want to be disturbed.

Choose from Available, Away, Do Not Disturb, Lunch, Business Trip, and Set Status Temporarily.
Customize your status in “Settings > Status Configuration”.
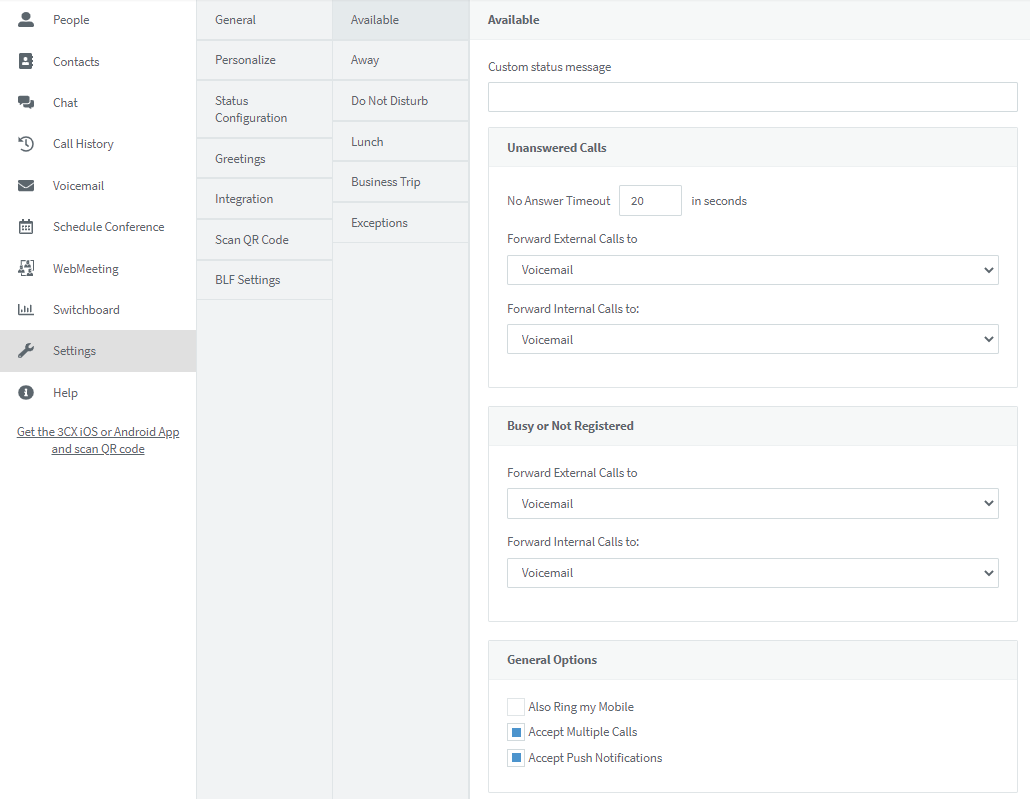
Here you can:
- Set a custom message
- Enable/disable Push notifications for each status
- Rename “Lunch” and “Business Trip” profiles
- Set the number of seconds to activate forwarding of unanswered calls for “Available” and “Lunch” profiles
- Override forwarding rules based on Caller ID and time of the call
Related Articles
3CX Web Client - New Version
3CX Web Client - One Stop for All Communications The 3CX Web Client is easy to use and combines all the features you need to efficiently communicate, collaborate and connect with colleagues, partners and customers, straight from your browser or from ...Setting up Wifi on Fanvil XU Phones
Most Fanvil Devices support wireless Internet access and require the use of a USB wi-fi adapter. Therefore, the device needs to have a USB Portal Please refer to the hardware description below for the supported models. Hardware X3U X4U X5U X6 ...How to Hot desk with your 3CX phone
Purpose: Steps to hotdesk with your 3CX phone Audience: End Users Requirements: A 3CX admin needs to have already set up a phone for hotdesking and your extension enabled for hotdesking Steps to log into a Hot-Desking Device 1) To log into a ...Setting up your Self-Identification Message
This guide is intended for end-users of the 3CX phone system. Your 3CX Administrator must set up the dial by name directory within your digital receptionist first for the following to work. Setting up your Self-Identification Message For the Dial by ...